
| All Terrain Vehicle |

|
 HOME
HOME  |
![]() All Terrain Vehicle in Quicktime Movie
All Terrain Vehicle in Quicktime Movie
RunningTime: 10min
  |
Spot the hazard
Most injuries result from lack of training and experience, speed, uneven or unfamiliar terrain, humps, logs, rocks, embankments, carrying a passenger or an unbalanced load, inadequate protective clothing and unsafe driving.
Assess the risk
Injuries are predominantly to legs, followed by injuries to spine, arms and head. Three and four wheeler spills often result in the rider being pinned beneath or rolled on by the vehicle. Assess all use of ag bikes for likelihood and possible severity of injuries.
The following suggestions will help minimise risks.
- Never ride an ATV without an approved helmet.
- Long sleeves and pants, sturdy boots and gloves all provide protection if you come off the vehicle.
- Eye protection prevents serious eye injuries from bugs, branches or stones.
Maintenance
- Check your ATV before riding it.
- Pay attention to maintenance advice in the vehicle manual.
- Check brakes and tires regularly.
- Ensure all parts are genuine or are at least equivalent components designed for use on your particular brand of bike.
Attachments
- Take extra care when using attachments such as spray tanks and other equipment on your ATV, as they can change the vehicle's centre of gravity and affect its stability.
- Ensure any attachments are designed for use on your ATV.
Terrain
- Be on the lookout for potential hazards when riding. Rocks, bumps, irrigation pipes and wildlife all have the potential to cause an accident, and should be approached with caution.
- Take extra care when operating a bike on unfamiliar or rough terrain.
- Where possible, use familiar farm tracks.
- Be particularly careful when turning, approaching a rise or navigating an obstacle. If you are not sure of your ability to clear an obstacle, find another route or go back.
Paved surfaces and public roads
 Stunts and speeding 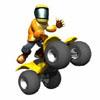 |
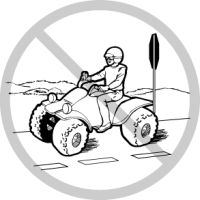
- Don't drive ATVs on paved or bitumen surfaces. They are not intended for use on smooth surfaces and could be difficult to control.
- Never ride ATVs on public roads. It may be difficult to avoid a collision if other vehicles are on the road.
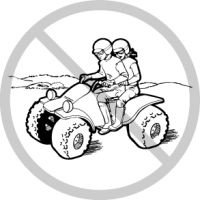
- Passengers and ATVs don't mix. ATVs are designed to be controlled by the shifting of weight around the vehicle. A passenger limits the driver's ability to do this.
- Children do not always have the weight, limb size , skill and judgement to control an ATV safely.
- No children under the age of 18 are allowed to handle an ATV
- Never attempt jumps, wheelies or other stunts on an ATV.
- Ride at an appropriate speed for the terrain, your experience and the visibility conditions.
Drugs, alcohol and fatigue
- Never ride under the influence of alcohol or drugs, including prescription drugs. They may affect your balance, vision, judgement and concentration.
- Fatigue can also limit your ability to control an ATV safely. Operating an ATV is more physically demanding than driving a car. If you are travelling long distances, take frequent rest breaks.
- Ensure you are dressed comfortably and appropriately - uncomfortable clothing can make you tire more easily.
Know the manual
- Be familiar with the capabilities of your machine.
- Read and understand the manual, particularly safety information.
- Know all warning labels on the machine.
OPERATING YOUR ATV
 |
Turns
Low-speed turns require that you shift your body weight forward and to the outside of the turn as you turn the handlebar. The objective is to reduce weight on the inside rear wheel.
For turns at higher speeds, you must lean your upper body toward the inside of the turn while keeping your weight on the outer footrest. If your ATV starts tipping during a turn at any speed, lean your upper body farther into the turn while gradually reducing the throttle and making the turn wider (see Figure 1).
Braking
Begin the braking process by releasing the throttle and shifting to a lower gear well in advance of the intended stopping point. With this method, the engine helps to slow your ATV. Applying brakes smoothly and evenly will bring your ATV to its quickest stop. Apply brakes lightly on slippery surfaces. When descending a hill, shift to a lower gear for engine braking rather than riding the brakes for an extended period of time.
   |
Climbing
The first rule to remember is to stay off hills too steep for your ability or that of your ATV. When approaching a hill, you should keep both feet firmly on the footrests and shift your body weight forward by sliding forward on the seat. For steep hills, stand on the footrests and lean forward to shift as much weight forward as possible. To reduce the chance of stalling the engine, climb hills in a low gear. If the engine does stall, you must apply the brakes before the forward motion stops. I your ATV stalls and then rolls backward, apply brakes slowly. Rapidly applying brakes during a backward roll can cause a rear overturn (see Figure 2).
Descending
Before descending a hill, you should shift the transmission into a low gear and point the ATV directly downhill. Keep both feet firmly on the footrests and slide back on the seat to increase your stability and the effectiveness of the brakes (see Figure 3).
Riding across slopes
Avoid crossing steep slopes and slopes where there is slippery or bumpy terrain. If you do ride across slopes, keep both feet firmly on the footrests and lean your body uphill. If the ATV begins to tip, turn the front wheels downhill. If the terrain prohibits your turning downhill, dismount on the uphill side immediately (see Figure 4).
Additional equipment
Additional equipment used to increase the uses ATVs can be divided into two categories: rigidly mounted on the ATV and pull-type equipment that is towed by the ATV's drawbar.
 |
Rigid mount equipment is usually bolted to the front or rear of the machine and includes luggage racks to transport feed or supplies, broadcast seeders and wick applicators for chemical weed control. This type of mounting places the entire weight burden on your ATV. You should realize that this will have a significant impact on the weight and balance of your machine. The center of gravity may be moved to a position of lessened stability. Mounting on the front can make steering more difficult and decrease traction on the rear wheels. Mounting on the rear can increase the chance of a rear overturn. Either mounting can increase the chance of a side overturn and requires added caution when operating on level as well as sloped ground.
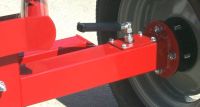 |
Pull-type equipment attached to the drawbar varies from a wagon of firewood to a row-crop sprayer. This type of mounting also has an effect on an ATV's stability. As the amount of drawbar pull required for the load increases, so does the tendency for the front end of the ATV to rise. Caution should be used not to expect more from your ATV than it can safely provide.
 |
Whenever equipment is added, counterweights can be used to offset the load and improve the new balance of your machine. Be careful not to exceed the weight limitations set forth by the ATV manufacturer. Remember, just because your ATV can pull a heavy load does not mean it can safely stop it.
Additional equipment may also require additional protective gear for the operator. Examples of this include protection from objects thrown by a mower and chemical protection from the drift of sprayers.